
Microsoft announced some Office 365 certificate changes last year: https://learn.microsoft.com/en-us/microsoft-365/compliance/encryption-office-365-tls-certificates-changes?view=o365-worldwide
If you’re using Microsoft Teams Direct Routing you need to apply a new root certificate to your SBCs. More specifically if your SBC has “TLS Mutual Authentication” enabled on the Teams SIP interface then you MUST make this change. I would recommend making this change anyway and ASAP!
How to check if TLS Mutual Authentication is enabled?
Log into your AudioCodes SBC, navigate to Setup > Signalling and Media > Core Entities > SIP Interfaces.
You should see an interface named “Teams” or similar. It could be named something else which you would need to check which “SBC IPv4 SIP Interface” is assigned to your Teams Proxy set.
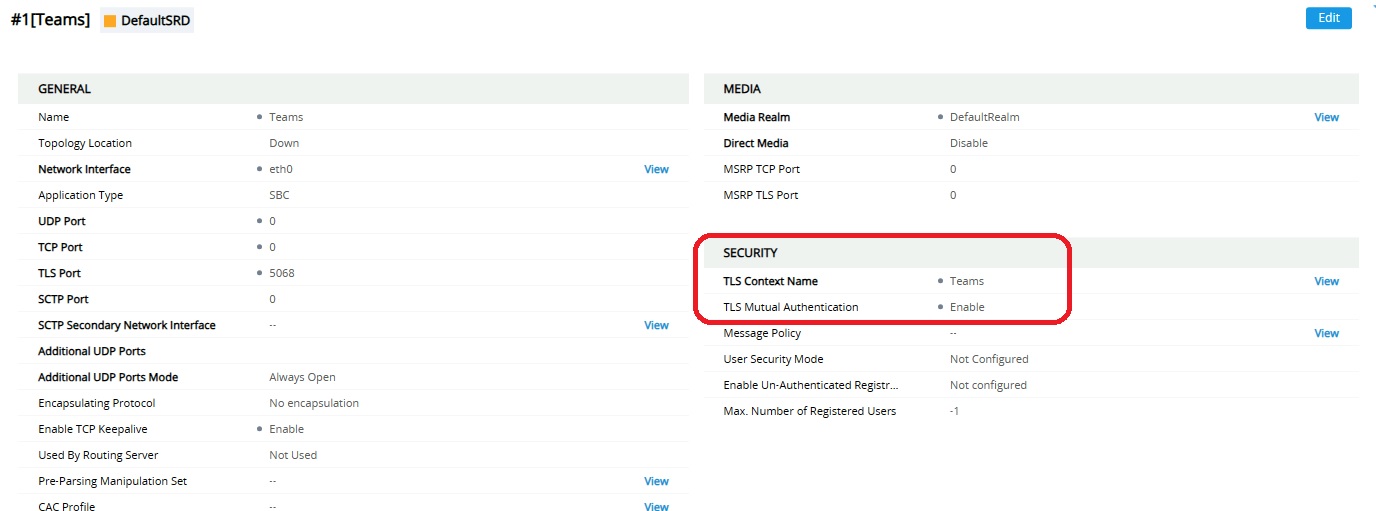
In the example above, the Teams interface is using the “Teams” TLS Context and does have TLS Mutual Authentication enabled meaning Direct Routing on this SBC will be impacted when Microsoft change their certificate.
Another place to check TLS Mutual Authentication is Setup > Security > Security Settings. There is a global TLS Mutual Authentication setting which is disabled by default.
How to upload the new Digicert Root certificate?
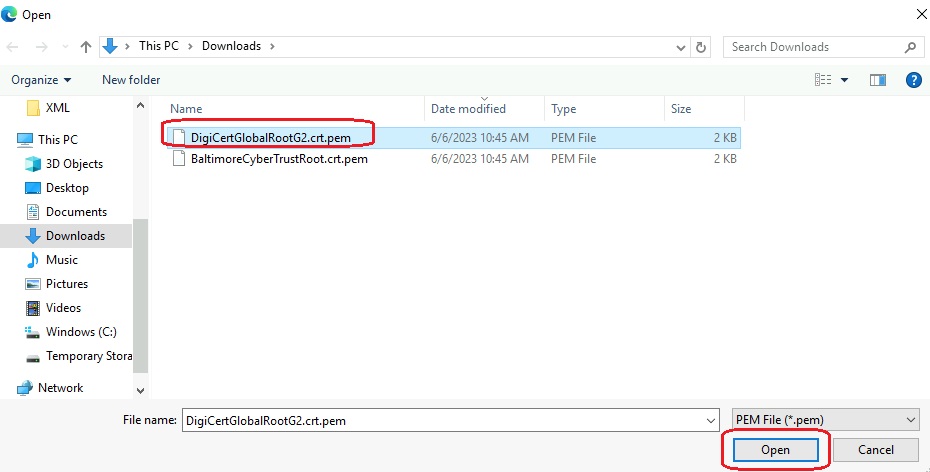
The first step is to download the Digicert Global Root G2 certificate in PEM format from here https://www.digicert.com/kb/digicert-root-certificates.htm
You should check the serial numbers and thumbprints match the Microsoft article here: https://learn.microsoft.com/en-us/microsoft-365/compliance/encryption-office-365-certificate-chains?view=o365-worldwide#digicert-global-root-g2

Once you have downloaded the certificate, on your AudioCodes SBC navigate to:
IP Network > Security > TLS Contexts
The TLS Context you need to edit will match the TLS Context assigned to the Teams SIP interface further up the article. In this instance it is named “Teams”.
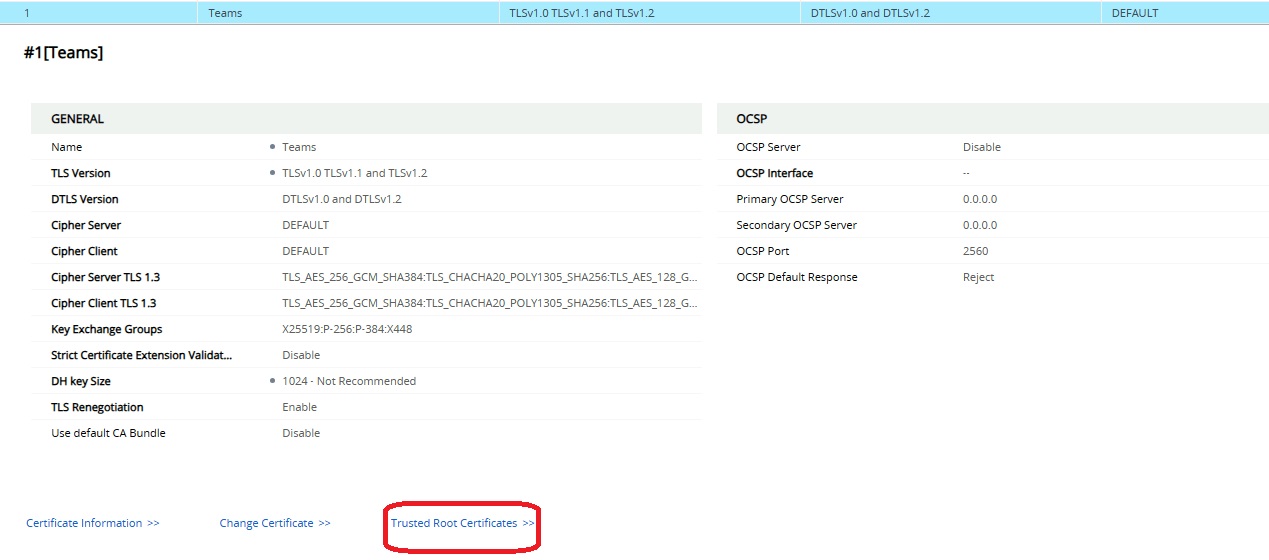
At this point, it’s probably a good idea to review the TLS Context settings. This is out of the scope of this post.
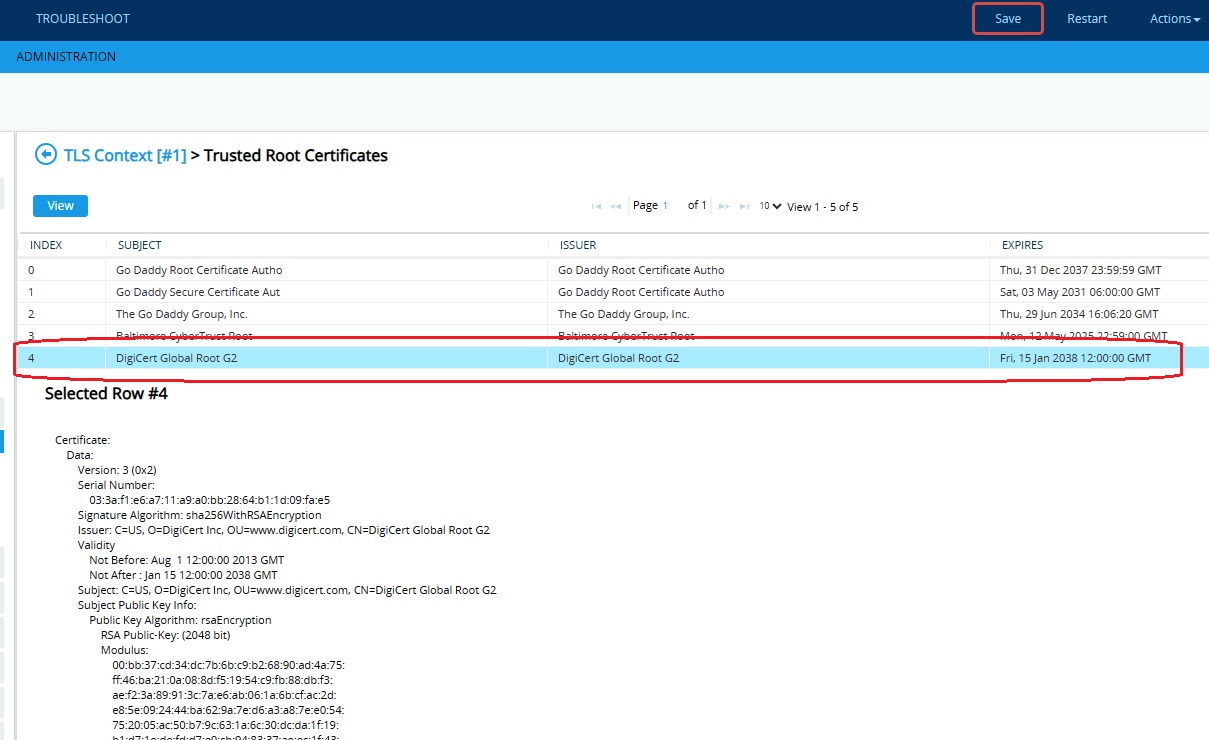
Click “Trusted Root Certificates”
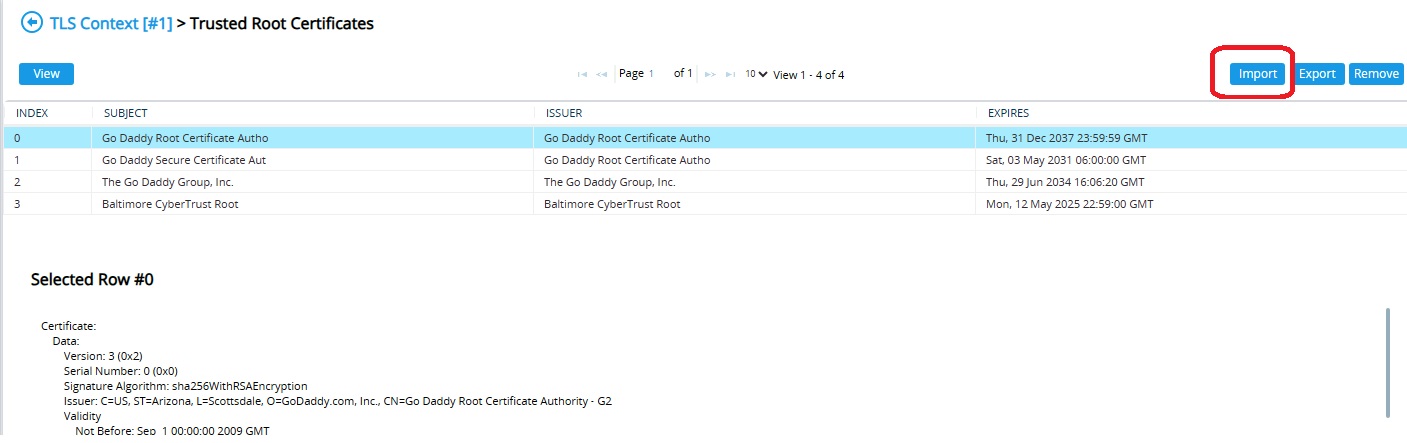
Click “Import”
Select the PEM file downloaded from Digicert and click “Open”
Check the Digicert Global Root G2 is now in the list and double check it’s the correct subject, serial number etc.
Finally click Save (top right) and confirm.
How to test the Digicert Root certificate is working?
The following post on LinkedIn was brought to my attention https://www.linkedin.com/feed/update/urn:li:activity:7087415295333605376/
The interesting part of the post is:
“If you’d like to test and confirm your SBCs certificate configuration prior to the change, Microsoft has prepared a testing endpoint that can be used to verify that SBC appliances trust certificates issued from the new root CA (DigiCert Global Root G2). This endpoint should be used only for SIP OPTIONS ping messages and not for voice traffic. If your SBC can establish a TLS connection to this endpoint, then your connectivity to Teams services should not be affected by the change.
Test endpoint FQDN: sip.mspki.pstnhub.microsoft.com
Port: 5061“
The easiest way to do this is to temporarily add a 4th Proxy Address to your Teams Proxy Set.
Note – I would recommend this is completed outside of business hours and removed once validated.
Navigate to Setup > Signalling and Media > Proxy Sets
Select your Teams proxy set (It should have 3 proxy addresses sip, sip1, sip2)
Click “Proxy Address 3 items”
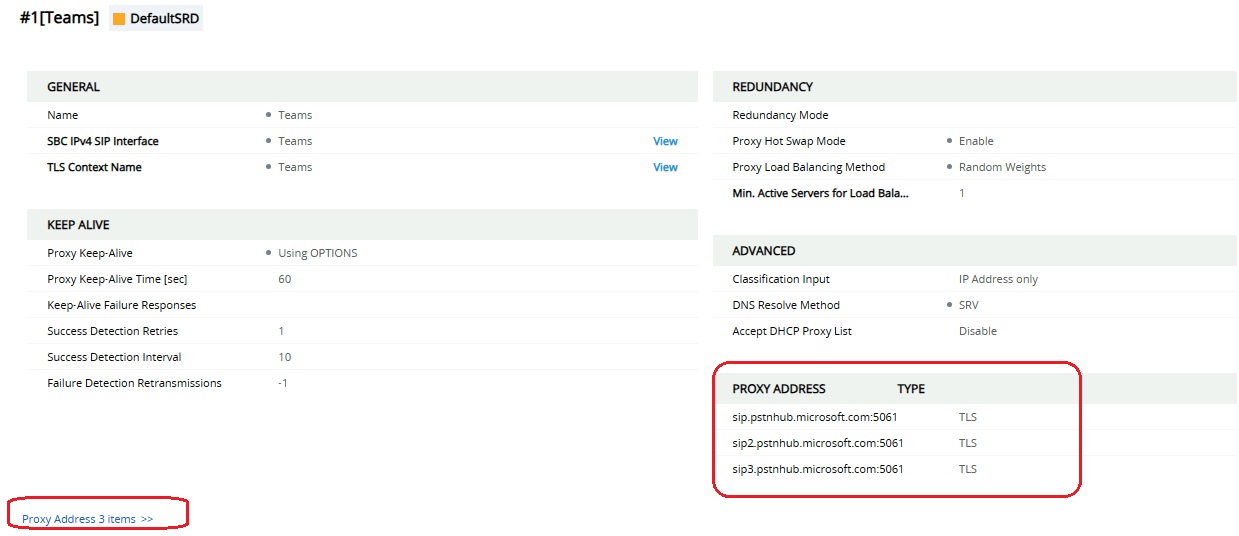
Before continuing just double check that Proxy Load Balancing Method is “Random Weights” and your Proxy Addresses are configured as follows:
sip.pstnhub.microsoft.com:5061 – Proxy Priority 1 / Random Weight 1
sip2.pstnhub.microsoft.com:5061 – Proxy Priority 2 / Random Weight 1
sip3.pstnhub.microsoft.com:5061 – Proxy Priority 3 / Random Weight 1
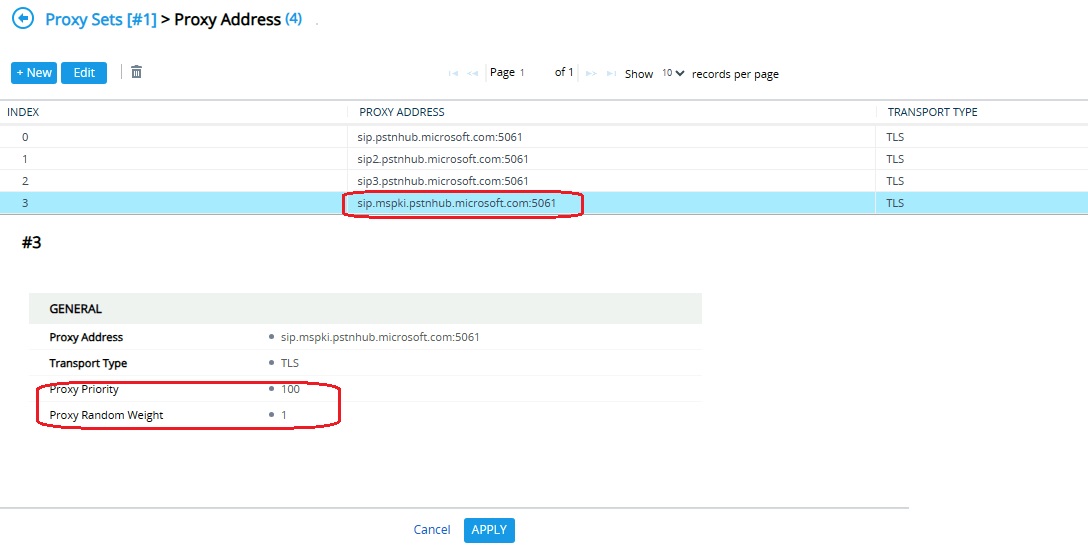
As long as your Teams Proxy set is setup like this (correctly) you can add a 4th Proxy address (Proxy Priority 4 or higher) as all calls will route to Priority 1 and fail over in order.
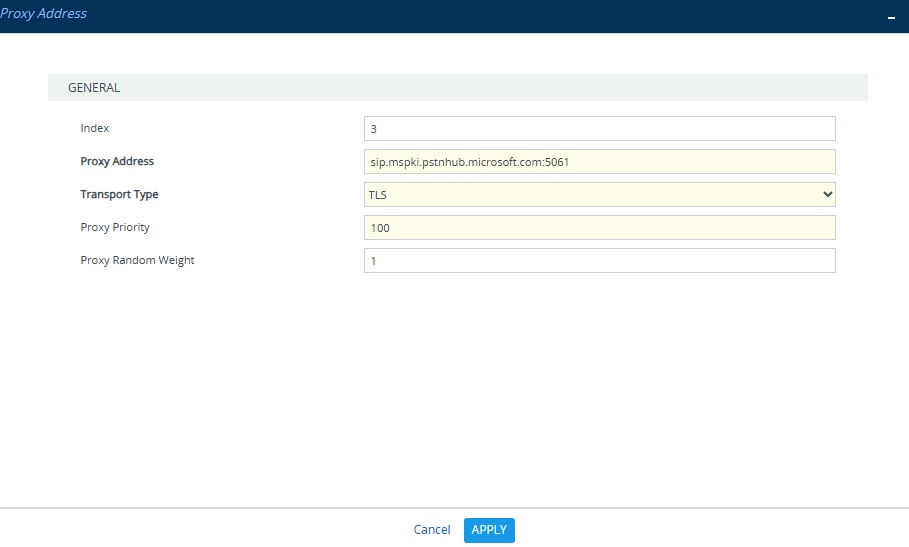
Click New
Proxy Address: sip.mspki.pstnhub.microsoft.com:5061
Transport Type: TLS
Proxy Priority: 100 (Ensure higher than production proxy addresses)
Proxy Random Weight: 1 (Same as other 3 proxy addresses)
Click Apply
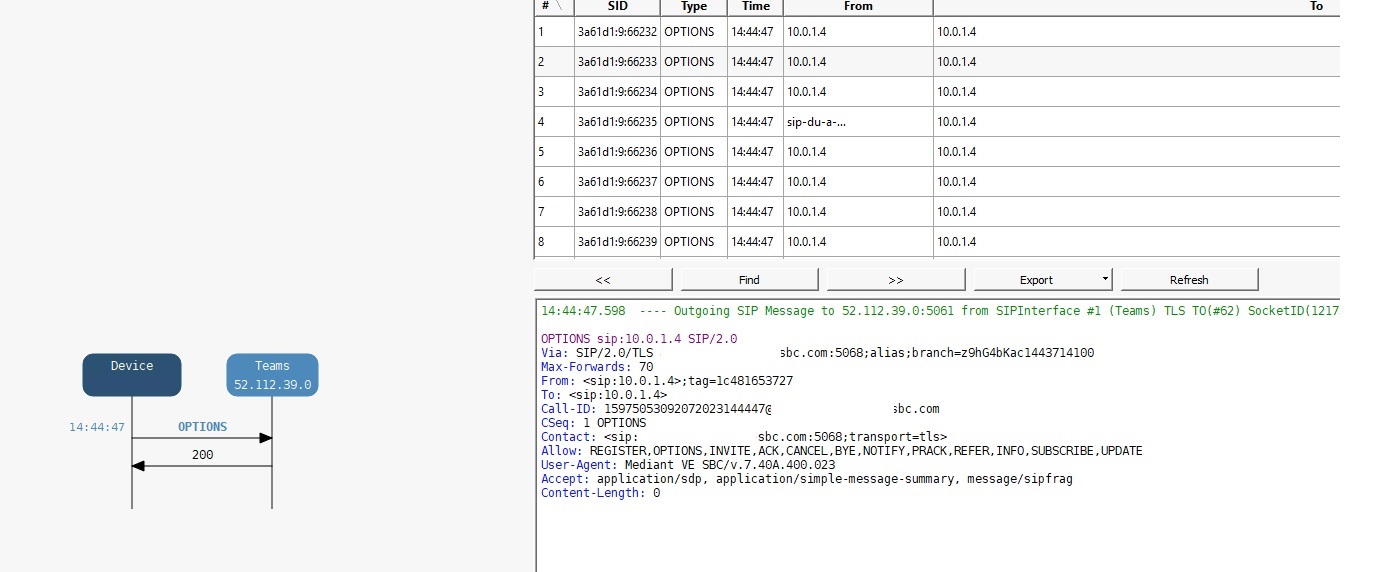
Navigate to Monitor > VOIP Status > Proxy Set Status
Find your Teams Proxy set and you should see the 4th proxy address with a success count > 1 (the counters reset after adding the new address) and Status = Online

Finally you should connect to the AudioCodes SBC with the Syslog Tool and confirm that the SBC is sending SIP Options and receiving a 200 OK back from the Microsoft IP address associated with the test proxy address. In this example it’s 52.112.39.0.
If you do not get a 200 OK back it means that there are problems with your SBC config. Note the Proxy Set Status will count any SIP response as a success and online.
Initially, I tried to just create a new Proxy Set. This showed as online in the Proxy Set Status screen, however a SIP trace showed 403 “REASON: Q.850;cause=63;text=”465957f3-8c57-4bc0-aa59-4420b270a5ec;SBC certificate is not issued correctly. Provided trunk FQDN ‘x.x.x.x’ is not included in certificate’s CN or SAN list. Certificate allows following FQDNs only: *.mydomain.com, mydomain.com, *.mydomain.com.””
I could have fixed this by creating a new IP Group but then decided the 4th Proxy Address is far easier.
Once you have confirmed SIP Options to & from the Microsoft Test address are working, you should remove it from your Teams Proxy Set.

Technical Architect